
Becoming a must-have product for the health-conscious, almond meal is an ingredient for gluten-free treats or a low-carb endeavour, made from ground almonds, which gives it a slight nutty flavour, rich texture, and versatility in recipes. Although almond meal can be purchased at any grocery store, it is fresher, cheaper, and more satisfying to make at home.
The good news is that, even if you’re making almond meal for the first time, it’s quite easy. And that means all you would ever need are almonds and a blender or food processor. Keep it at hand; homemade almond meal becomes the best natural ingredient for cookies, smoothies, sauces, and other creative concoctions.
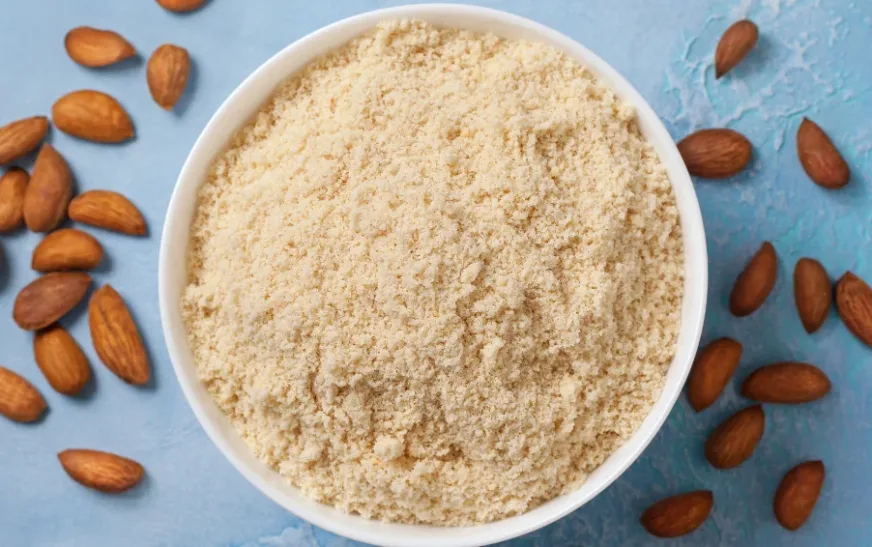
What is Almond Meal?
Before we proceed with the how-to, let’s discuss what almond meal truly is.
In essence, almond meal is made by grinding raw almonds into a coarse consistency similar to flour. Because the almonds’ skins are still on them, it has a slightly coarser texture and a slightly darker colour than almond flour. Despite their proximity, they are different.
- Almond Meal: Raw almonds with the skin on are used to make almond meal.
- Almond flour: It has a finer texture and is made from blanched almonds that have had their skins removed.
Use almond meal in recipes where almond flour is called for, except in fine pastries where texture matters.
Why Make Almond Meal at Home?
There are many reasons for making your own almond meal rather than buying it prepackaged. These are some examples of why:
- Freshness: Homemade almond meal is not stored on shelves for months.
- Cost savings: Buying whole almonds in bulk and grinding them yourself can be less expensive than purchasing almond meal.
- Additive-free: Sometimes, store-bought almond meal contains preservatives or anti-caking agents. Making it at home means you know exactly what goes into your food.
- Custom texture: Would you like it finer or chunkier? You decide.
- Eco-friendly: Less packaging waste, that’s always a plus!
Read Also: How to Make Almond Cookies?
What You’ll Need?
Some basic things you’ll need to begin:
- Raw almonds 1 cup (with skin)
- High-speed blender or food processor
- A fine mesh sieve or sifter (optional)
- Clean a jar or container for storage
That’s all! No expensive equipment or ingredients are required.
How to Make Almond Meal at Home?
Step 1: Select the Proper Almonds
First and foremost, use almonds that are raw, unsalted, and unroasted. These would be the best choice for almond meal. Avoid roasted almonds because roasting alters their flavour and texture. Also, they may have added oils or salt.
Want lighter almond meal? Just blanch your almonds first to remove the skins. Skin-on almond meal gives you a little rougher texture but more nutrients.
Step 2: Dry the Almonds (Optional but Recommended)
If the almonds have been sitting in the fridge or freezer, or if they feel slightly moist, then it is best to dry them. The presence of moisture is going to make the almond meal clump and seriously cut down on how long it can keep.
This is how you do it:
- First, arrange the almonds in one layer only on a baking sheet.
- Bake in a preheated oven at 200°F (90°C) for 10–15 minutes.
- Allow them to cool completely before grinding.
You must be careful not to roast them-you just want to dry them, not toast them.
Step 3: Grind the Almonds
It’s time to grind up those almonds into almond meal!
- In a blender or food processor with a high speed, add about 1 cup of almonds.
- Use short bursts or pulses, avoiding continuous blending. Continuous blending will turn the almonds into almond butter!
- Stop every 10–15 seconds and check the texture while scraping the sides of the container if needed.
Do not stop until you have reached a fine, sandy consistency with utmost patience. Going too far is just an oily mess.
Step 4: Sifting (Optional)
This is completely optional, and you can omit it if you want a rougher almond meal. Pour the almond meal through a fine mesh strainer or flour sifter after you have ground it. This separates any large bits that were not ground completely. You could either throw these bits back into the blender to grind again or add them to smoothies or oatmeal.
Step 5: Store It Properly
Once you have the almond meal ready, transfer it to a clean, airtight jar or container. Store it in a cool and dark place, like your pantry or kitchen cabinets.
For a longer shelf life, keep it in the fridge for two months or the freezer for six months. Seal it well to avoid moisture or freezer burns.
Tips for Success
- Work in tiny quantities: Don’t put too much strain on the food processor or blender.
- Don’t over-blend: If it looks even a tad wet or sticky, you’ve blended it way too much, so much so that it is almost almond butter.
- Dry Completely: Let the almonds cool fully after drying in the oven. When blending, warm almonds often release oils.
- Use dry equipment: Any kind of moisture can lead to clumping and eventually spoilage.
- Label: Name and date your container before storing it, especially if storing in the freezer.
How to Use Almond Meal?

It is time to put your homemade almond meal to good use; here are some fun and easy ways to:
- Baking: Mix it into your muffins, cookies, pancakes, or banana bread for extra moisture and texture.
- Smoothies: Give a spoonful for your morning smoothie that carries fibre, good fats, and protein.
- Coating: Use this instead of breadcrumbs to coat chicken, fish, or veggies for a gluten-free pathway.
- Thickener: Stir it into soups, stews, or sauces to thicken them up naturally and without using any flour or starch.
- Crusts: Mix with some melted butter and press into a pie dish for a low-carb tart crust.
From paleo to keto to just clean eating, almond meal fits right into your lifestyle.
Read Also: Oat Milk vs. Almond Milk
Final Thoughts
Homemade almond meal is simple, cost-effective, and more nutritious than store-bought. Just one ingredient and a few minutes of your time, and you’ll have a fresh pantry staple ready to use in a variety of recipes.
You have full control over the texture and freshness, and the whole thing is so easy that you will wonder why you haven’t done this sooner.